
Arched Openings Made Easy!
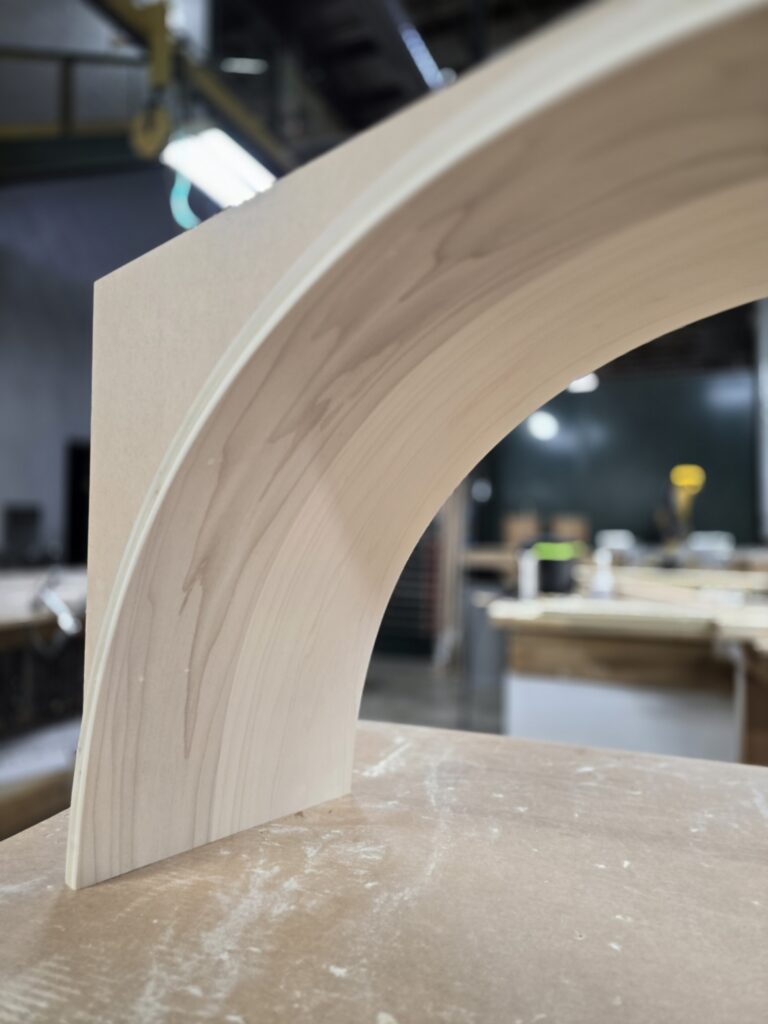
Every Koetter Jamb Box is delivered fully assembled, ready to install. FACTORY ASSEMBLED. FIELD SIMPLIFIED. Koetter Woodworking’s Radius Jamb Box is a fully assembled bentwood jamb system that eliminates time-consuming field framing and delivers factory-built precision on every project. SAVE TIME – Eliminates time-consuming field framing and reduces the need for complex layout and measuring. IMPROVE ACCURACY – Factory-built precision helps eliminate costly fitting issues in the field. CLEANER INSTALLATION – Arrives fully assembled and ready to install for a cleaner, more efficient jobsite experience. REDUCE JOBSITE MOVEMENT – The factory-assembled frame helps keep the bentwood jamb head aligned, minimizing field adjustments caused by prolonged exposure to changing jobsite conditions. HOW TO ORDER YOUR CUSTOM JAMB BOX Specify your opening type – half round, segment or elliptical Provide the inside dimension and rise of your radius Specify the species – choose from any in species our standard offering! Note the drywall thickness – 1/2″, 5/8″ or other INSTALLATION NOTES EASY INSTALLATION – Position the Jamb Box in the square top rough opening, shim as needed, and fasten the box to the framing. OVERALL WIDTH – Outside finished dimension of Jamb Box will be 2″ wider than the specified inside diameter (ID). OVERALL HEIGHT – Finished Jamb Box height is 1-1/2″ taller than the specified inside rise. AI Generated Image – For Illustration Only Know someone who could benefit from the Radius Jamb Box? Save this page for future reference and share it with your builder, dealer, or installer. For pricing, availability, and ordering information, contact your Koetter sales representative or preferred dealer. DOWNLOAD PRODUCT GUIDE
A Midwest Take on Interior Design Trends in 2026

Trends Come and Go. But good design – the kind that feels right five, ten, even twenty years down the road – tends to stick around. As we look ahead to 2026, we’re seeing a clear shift in home interiors here in the Midwest. While design trends emerging from California and New York often lean into bold experimentation, Midwest homeowners and designers are asking a different question: “How do we create homes that feel refined and livable – warm, intentional, and built to last?” The answer shows up again and again in one place: authentic materials, purpose-driven design, and real wood details that do more than just “finish” a space. They’re the details that quietly guide how a home looks, feels, and functions for years to come. Here’s what we’re seeing, and how hardwood mouldings, doors, and architectural details are shaping Midwest interiors in 2026. Save & Share Defined Spaces Make a Comeback Open-concept living isn’t disappearing, but it is being refined. Midwest homeowners are asking for: Better room definition Defined transitions between spaces Architecture that helps spaces feel purposeful The result: Architecture that reinforces function and flow, often through thoughtful transitions, openings, and architectural details. Defined openings create purposeful transitions without closing off space. Warm modern interiors blend clean lines with natural materials for livable elegance. Earthy Palettes Replace Stark Whites All-white interiors had a long run. In the Midwest, that shift is happening. For 2026, we’re seeing: Warm whites instead of bright whites Clay, taupe, and muted green tones Rich wood stains that highlight natural grain Well-designed homes feel curated and collected, not overly dominated by a single material. In response, designers are leaning into balance, pairing softer paint tones with stained wood doors, layered trim profiles, and natural finishes that bring contrast without competing for attention. These rich palettes work especially well with hardwood millwork, creating interiors that feel warm, comfortable, and livable year-round – not stark or one-dimensional. Interior Doors Step Out of the Background Interior doors are no longer just pass-throughs. In 2026, they’re being treated more like focal points for your openings. Homeowners are gravitating toward: Unique panel designs Groove and reeded details Accent doors that introduce contrast or become focal points in key spaces The Midwest difference: We are seeing doors that make a statement – but not at the expense of durability or function. They feel intentional, substantial, and built for real life. When doors are designed to complement the architecture instead of disappearing into it, the entire home feels more connected. Accent doors add visual emphasis. Visible wood grain and texture add architectural depth and character. Warm Modernism Takes Center Stage The Midwest version of modern design is evolving. Clean lines are still very much in play, but stark, ultra-minimal spaces are giving way to softer, warmer interiors that feel more inviting, especially in regions where winter is part of the lifestyle. In 2026, modern homes are defined by: Warm neutral palettes Visible wood grain Understated profiles with depth Soft Curves Make a Strong Impression In 2026, interior design is embracing curves with purpose. Rather than rigid, all-linear spaces, homes are incorporating arched openings, softened profiles, and radius details that add warmth and movement. Arched doorways and curved transitions create a natural flow between spaces, while subtle millwork details help soften the overall look. These shapes bring a sense of craftsmanship and refinement, without relying on ornamentation or excess. It’s a design move that feels especially at home in the Midwest: intentional, balanced, and built around architecture that lasts. Curved architectural elements help soften interiors Trends Change. Architecture Lasts. In the Midwest, the most successful interiors aren’t driven by trends alone, they’re shaped by materials, proportions, and details that stand the test of time. Doors, mouldings, and architectural details play a central role in how spaces flow, function, and feel. By offering a broad selection of hardwood species, profiles, and door designs, our products give designers and builders the tools they need to create interiors that feel intentional, balanced, and built for the long term. Want to save or share these insights? Download the PDF, below! Download the PDF
Specifying Smarter: Why Red Oak Deserves a Second Look
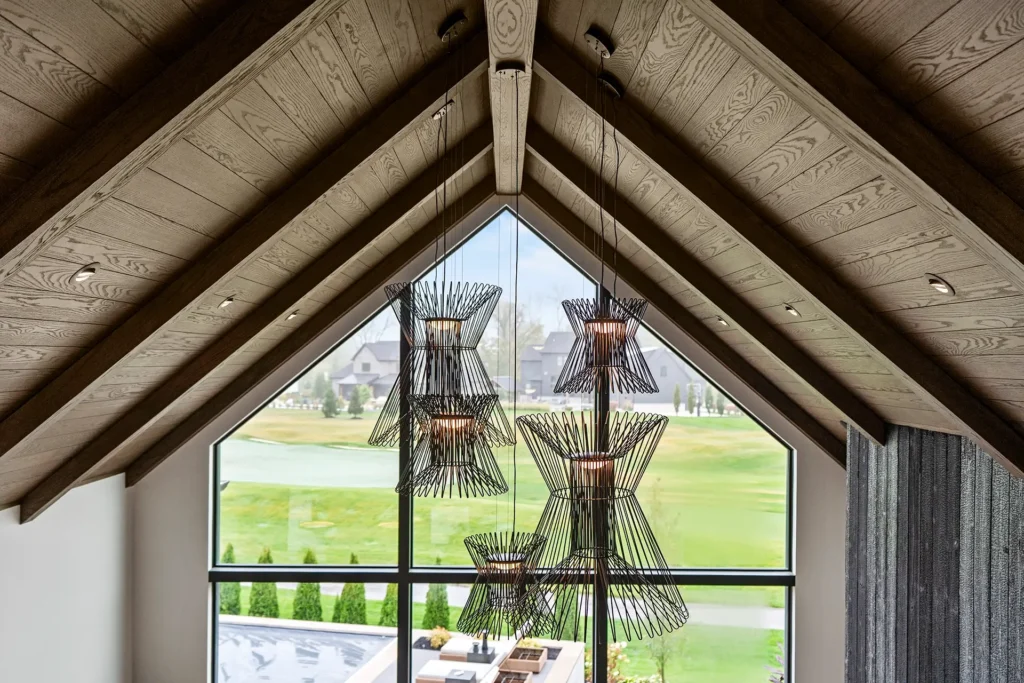
For several years, White Oak has dominated the design scene, prized for its neutral tones, durability, and versatility. But with soaring demand comes higher prices, longer lead times & limited availability. If you’re looking for a smart alternative that delivers the same aesthetic appeal without the premium price tag, Red Oak is worth a closer look. When finished correctly, Red Oak can mimic the look of White Oak while offering its own advantages, including greater availability and a more budget-friendly price point. Its distinctive grain, which some assume is a drawback, can actually be softened with the right stain or finishing techniques to closely resemble the neutral tones that make White Oak so desirable. In this article, we’ll break down the key differences between Red and White Oak, explore how proper finishing techniques can bring Red Oak into the modern design aesthetic, and showcase why this classic species deserves another look in today’s market. White Oak’s naturally muted color and tight grain make it a popular choice for modern interiors. However, Red Oak’s open grain can be toned down and neutralized with the right finish, helping it achieve a similar look. Before we get into finishing techniques, let’s break down the key differences between the two species: How to Make Red Oak Resemble White Oak The key to making Red Oak more closely resemble White Oak lies in how you prep and finish it. Here are a few suggested techniques: Use a Tannin-Blocking Primer or Pre-Stain Conditioner Red Oak has higher tannin content, which can sometimes pull warm or pink undertones. A tannin-blocking primer or a pre-stain wood conditioner helps create a more even, neutral base before staining. Choose the Right Stain Colors To counteract Red Oak’s natural pinkish hue, opt for stains with a slightly green or gray undertone. Popular choices include: Walnut, Espresso, Blackened Tones – Red Oak takes them on with ease, creating a dramatic, high-end look perfect for traditional and modern spaces alike. Weathered Oak – Softens the red tones, giving a more neutral, aged look. Classic Gray – Mutes warmth and creates a cooler, modern tone. Custom White Oak Wash – A diluted white or light beige stain that neutralizes the red while enhancing the grain. A stain sample test is always recommended, as Red Oak absorbs stains differently depending on its cut and grain pattern. Use a White-Tinted Sealer or Glaze Applying a white-tinted glaze or sealer after staining can help neutralize any remaining warm undertones and brings out a softer, more refined look, closer to White Oak. Opt for a Matte or Satin Finish A matte or satin topcoat will reduce the natural sheen of Red Oak, helping it blend more seamlessly into modern designs. Why Red Oak May Be the Smarter Choice Beyond its ability to mimic White Oak, Red Oak offers several advantages: Cost-Effective – With White Oak prices continuing to rise, Red Oak provides significant savings without sacrificing quality. Readily Available – Better width and length availability means fewer joints and faster turnaround. Sustainably Sourced – A widely available domestic hardwood, Red Oak is a responsible choice for eco-conscious builders and designers. Durable & Strong – Red Oak is still an incredibly resilient hardwood, making it an excellent choice for interior doors, trim, and millwork. Work with a Qualified Finisher for Best Results While the right products and techniques can help Red Oak resemble White Oak, achieving a truly seamless look requires skill and expertise. That’s why we recommend working with a qualified finisher who understands the nuances of wood species, stain absorption, and color correction. While DIY staining might work for small projects, when it comes to high-end millwork and doors, the expertise of a professional finisher makes all the difference. Investing in proper finishing ensures a long-lasting, high-quality result that stands the test of time.
Introducing Primed Birch Plywood!
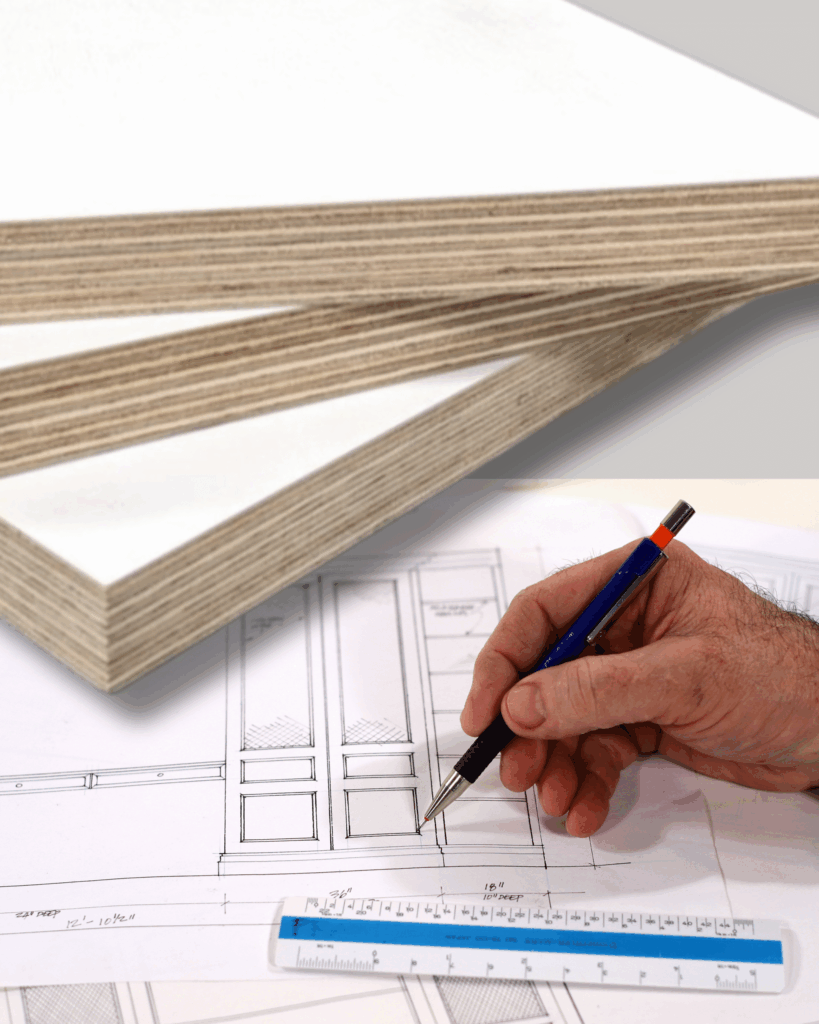
We’re excited to introduce Primed Birch Plywood to our stock lineup – a game-changer for cabinet makers, trim carpenters, and OEM manufacturers. This 18mm x 4 x 8 sheet stock comes pre-primed on both sides with a durable UV-based primer, which means zero time spent priming in the field! – Reduced Labor Costs: Streamline your production process and get more done in less time. – Flawless Finish: Achieve a professional, smooth surface every time. – Increased Profitability: Just cut, assemble and paint! (light sanding recommended) Whether you’re crafting cabinets, shelving, built-ins, or any other woodworking project, our primed sheet stock helps you work faster, smarter, and more efficiently. NOW IN STOCK & READY FOR SHIPMENT! Contact your sales representative for pricing.
Scaled Design Samples!
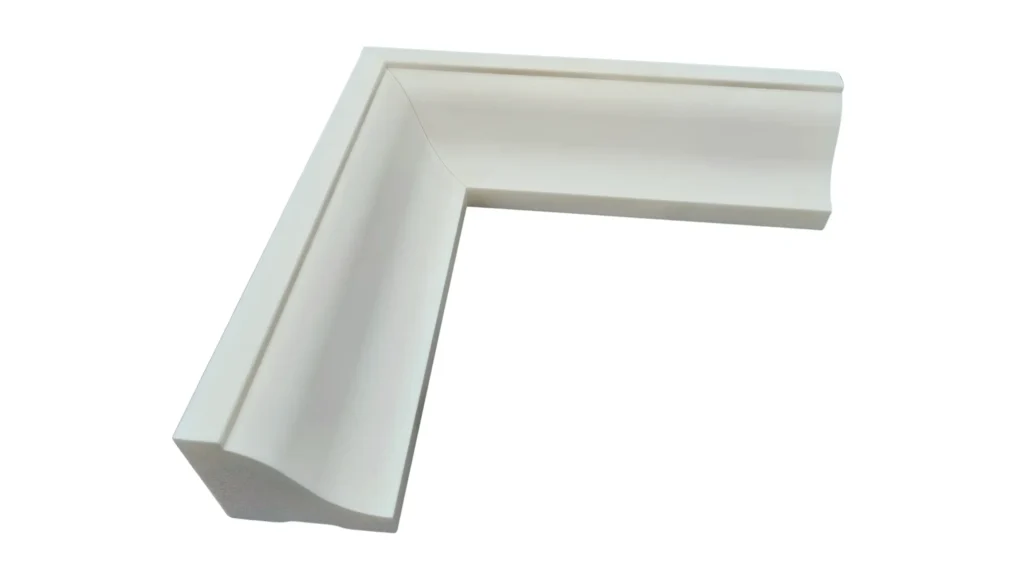
Say goodbye to high costs and extended wait times for custom trim samples! Getting design approvals shouldn’t slow your project down—or break the budget. Our all-new scaled moulding samples provide a precise, realistic preview of your custom profiles, helping you move forward faster while saving time and money. Samples in Days – Not Weeks! Traditional wood samples require milling, set up, and material costs—not to mention the time lost waiting for them. With our innovative scaled design samples, you get fast, accurate previews at a fraction of the cost. Why You’ll Love Them! ✔ Fast-track production – No waiting weeks for a custom sample. ✔ Big savings – Skip the cost of milling, potential tooling, and material waste. ✔ See the details before you commit – A clear, detailed preview before final production. ✔ No tooling? Not a problem! A game changer for profiles where tooling doesn’t yet exist. ✔ Design flexibility – Make any necessary changes before finalizing for production. ✔ Keep your project on track – Reduce delays and stay ahead of schedule. Why pay more and wait longer when a smarter, faster, and more cost-effective solution is available?
The All New Masonite Bayshore!
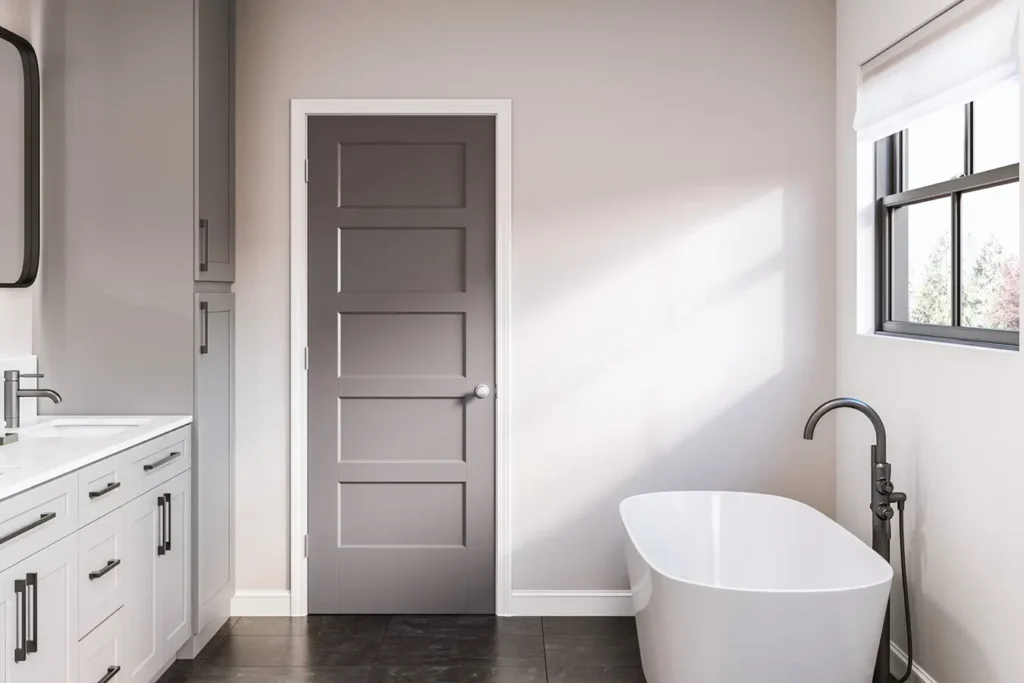
We’re excited to unveil the latest addition to Masonite’s Heritage Series: Introducing Bayshore! Designed in response to the growing demand for shaker-style recessed panel doors, the 5-panel Bayshore is a perfect complement to the existing Heritage series designs, including Lincoln Park, Logan, and Winslow. The Bayshore collection is now available by special order in all common widths, heights, and core types—including hollow core, solid core, and 20-minute fire-rated options. Download PDF!
Protecting Your Investment: The Essential Guide to Maintaining Exterior Wood Doors
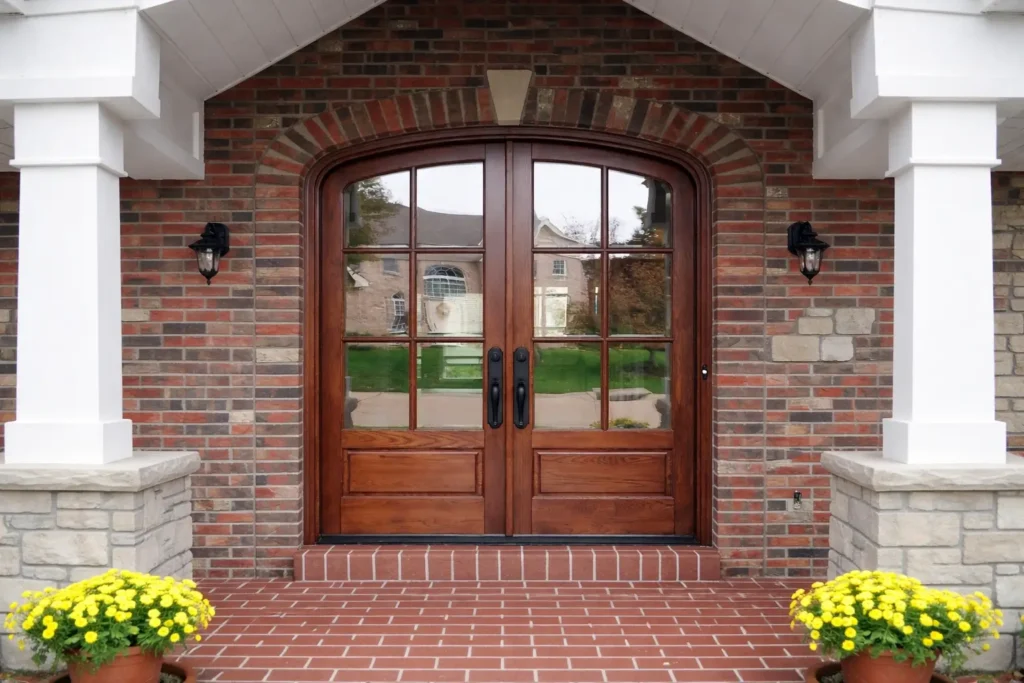
As a significant investment in your home’s exterior, wood doors provide both beauty and durability. From ensuring an ideal installation setup to regularly maintaining the finish, taking a few extra steps will help keep your door looking great and performing well for years to come. Let’s dive into some essential tips for maintaining wood exterior doors to preserve their longevity and beauty. Installation: The Foundation of Door Longevity Proper installation is crucial to getting the most out of your exterior door, and one of the most important aspects of that is an adequate overhang. Just like you’d pull out an umbrella in a rainstorm, a well-placed overhang shields your door from environmental elements. The overhang prevents direct exposure to rain, snow, and harsh sunlight, which can quickly deteriorate the finish. Overhang Requirements: For adequate protection, an overhang depth that’s at least equal to or greater than the distance from the bottom of the sill to the base of the overhang is needed. The width of the overhang should extend half of this distance from each edge of the door unit. This provides a significant barrier against exposure to the elements. Positioning Tips: In addition to the overhang, consider the door’s location. Doors facing south or west, where sun exposure is more intense, may require even more protection. An adequate overhang is crucial in protecting your wood door from the elements. Maintaining the Finish: Your Door’s First Defense The finish on a wood door serves as its first line of defense against moisture, UV rays, and temperature extremes. Left untreated or inadequately maintained, the finish will deteriorate, allowing water and sunlight to reach the wood. Why Regular Finish Maintenance Matters: Think of the finish as a shield for the wood underneath. Without a well-maintained finish, the door’s natural beauty fades, and its durability declines. Over time, the sun’s UV rays will break down the finish, allowing moisture to penetrate, leading to warping, cracking, and fading—problems that can significantly compromise the door’s integrity and appearance. Regularly maintaining the finish helps prevent these issues from taking hold. Maintenance Tips: Keep an eye out for signs of wear, such as cracks, peeling, or discoloration in the finish. If you see these signs, it’s time for a fresh coat. Most finishes need a touch-up every two to three years, though doors subjected to intense sun or heavy rainfall may require more frequent applications. Sealing Around Glass Openings: Protecting Against Hidden Vulnerabilities For wood doors with glass panes, sealing around the glass is crucial for long-term durability. Over time, moisture can find its way into small gaps between the glass and the wood, which may lead to rot, mold, and even condensation between glass panes. These issues not only impact the appearance of the door but can also weaken the structural integrity of the wood. Why Sealing Matters: Just like the finish on the wood, a strong, water-tight seal around glass openings is necessary to prevent moisture infiltration. When left unchecked, moisture that seeps in through these gaps can warp or swell the wood, cause fogging in glass inserts, and may even lead to costly repairs or replacements down the line. Maintenance Tips: Regular Inspections: Check the sealant around glass openings at least once a year. Look for any signs of cracks, gaps, or discoloration that might indicate moisture has seeped in. Reapplying Sealant: If you notice any weaknesses, re-apply a quality exterior-grade sealant around the perimeter of the glass. Moisture intrusion can occur through improperly sealed glass openings, damaging the seal and allowing water to enter the interior. Real-Life Example: A Tale of Two Doors As they say, a picture is worth a thousand words. To illustrate the difference maintenance can make, let’s look at two photos: one of a door that has seen several years of neglect and another of its freshly installed replacement. In the first door, you can see how exposure to the elements and an unmaintained finish has caused this entry unit to deteriorate. In contrast, the new door, with a fresh, high-quality finish, highlights the difference proper care can make! Key Takeaways: Proper installation and regular finish maintenance are the two most important factors in protecting your wood exterior door from the elements. Not only will these steps save you time and money on repairs, but they will also keep your doors looking stunning and functional year after year. When it comes to finishing or refinishing your exterior door, consult a qualified finisher who can recommend the right products and techniques to give your door maximum protection against the elements. By following these guidelines, you can enjoy the natural beauty and durability of your wood exterior door for years, enhancing your home’s curb appeal and safeguarding your investment!
Modern Groove Series – Doors That Create A Statement
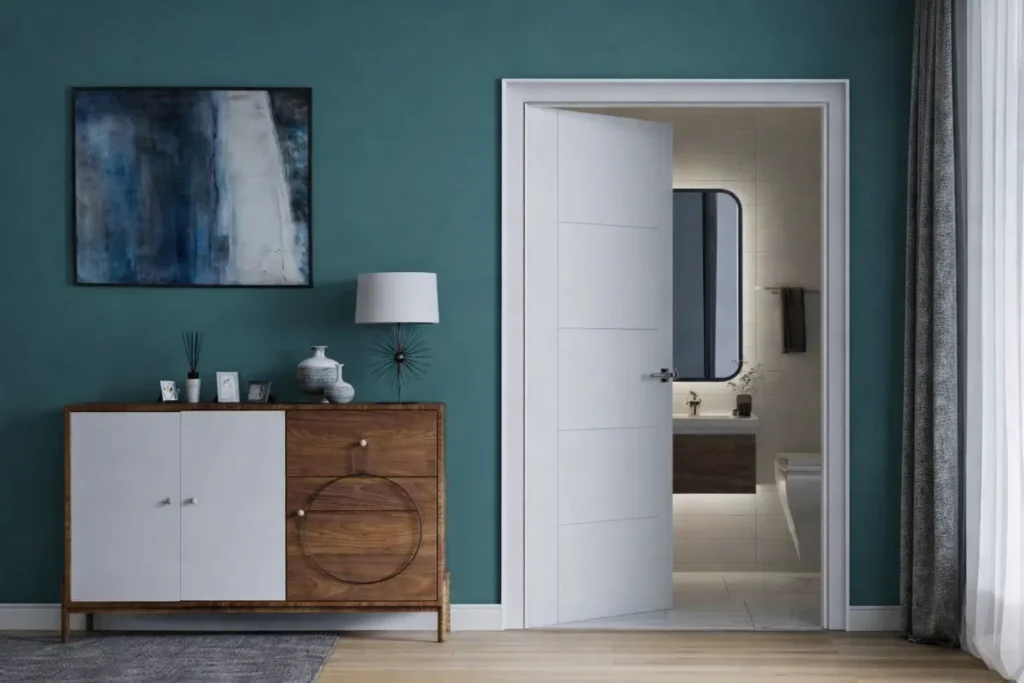
Koetter Woodworking’s Modern Groove Series transcends today’s modern and contemporary interiors by transforming functional doors into stunning design elements. By integrating solid wood, stave core stiles & rails with premium MDF, the Modern Groove Series delivers a well-defined tongue and groove appearance with pronounced definition and shadow lines. Find inspiration in our existing collection or design something one-of-a-kind – send us a sketch and we’ll bring it to life! Contact your Koetter Woodworking sales representative for more details!
White Oak: Unveiling the Beauty Within

White Oak’s natural beauty is undeniable, but did you know the way it’s sliced can transform the entire look? Today, we’ll dive into the world of plain sawn, quarter sawn, and rift sawn White Oak. We’ll explore how each type is cut from the log, how it affects the grain pattern and stability, and which might be the perfect choice for your next project! Slicing the Pie: Understanding the Cuts Imagine a log as a round pie. Plain sawn lumber, also referred to as flat sawn, cuts slices parallel to the pie’s crust, yielding wider pieces than its rift and quartered counterparts. In contrast, quarter sawing or rift sawing involves cutting the pie into quarters first, and then slicing those quarters. This method of sawing produces boards that are inherently narrower because they follow the pie’s radius, not its diameter. The price of each of these cuts is directly related to the amount of waste involved in cutting them. PLAIN SAWN: Anything but plain! Plain sawn boards are sliced straight through the log, revealing the familiar curved “cathedral” growth rings. The character makes plain sawn White Oak a perfect choice for those who love the inherent artistry of wood and want to incorporate its natural beauty into their space. This method of sawing provides the greatest yield from the log. QUARTER SAWN: Quarter sawing prioritizes the visual appeal of the straight grain along with prominent medullary rays. When lumber is quarter sawn, these rays get sliced on an angle, creating a stunning visual effect known as “ray fleck” – a beautiful, wavy pattern within the wood. This method produces a more stable product, limiting movement across the width of the board and further enhancing stability. Note that quarter sawn can include 20% – 25% of rift sawn material, which is why you will often hear it referred to as “rift and quartered”. RIFT SAWN: Similar to quarter sawn, but with an extra step! The quarters are sliced at an angle, resulting in a straight, linear grain throughout the board. Rift sawn offers the same dimensional stability as quarter sawn, making it perfect for hardwood flooring, high-end furniture and applications requiring increased dimensional stability. It is also the most costly and incredibly difficult to procure in widths or lengths that are conducive to architectural millwork. As with its quarter sawn counterpart, rift sawn can contain up to 25% quartered material. Koetter Woodworking offers a wide selection of White Oak S4S in both plain sawn and quarter sawn. Additionally, we manufacture made-to-order products, including architectural moldings, doors, stair components, and more. We hope that this has provided you with a better understanding of how White Oak’s transformation unfolds with each cut! When choosing White Oak for your next project, consider the balance between visual appeal, stability, and of course, your budget!
Modern Wall Coverings

Check out the newest collection of modern wall coverings, including cove, slat wall and reeded designs! Continue Reading Modern Wall Coverings